今回はXamarin.Formsで使えるNugetパッケージを作成して、実際にプロジェクトに取り込み使ってみます。
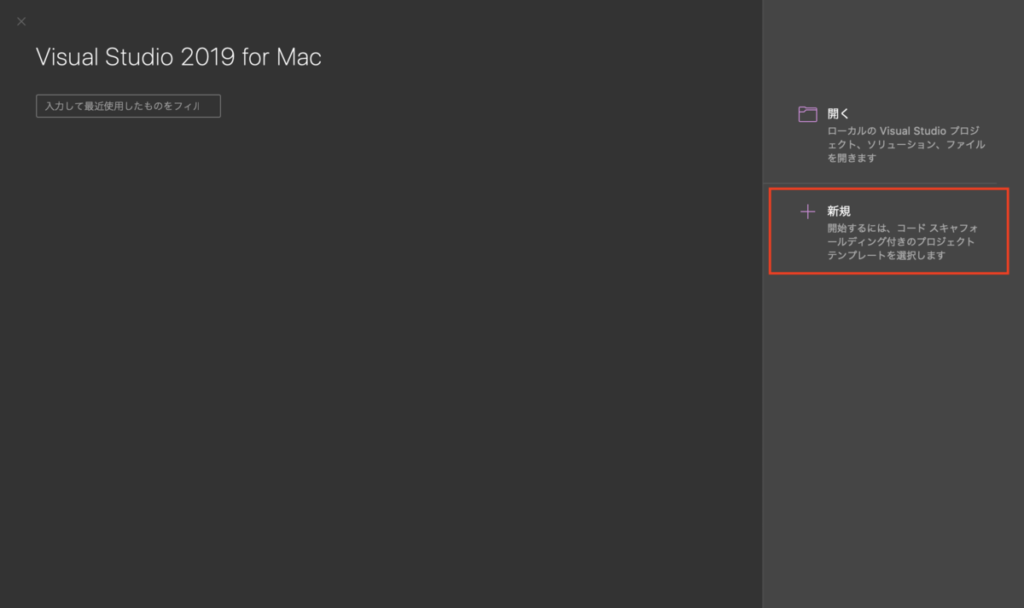
1.VisualStudioを起動し新規を選択
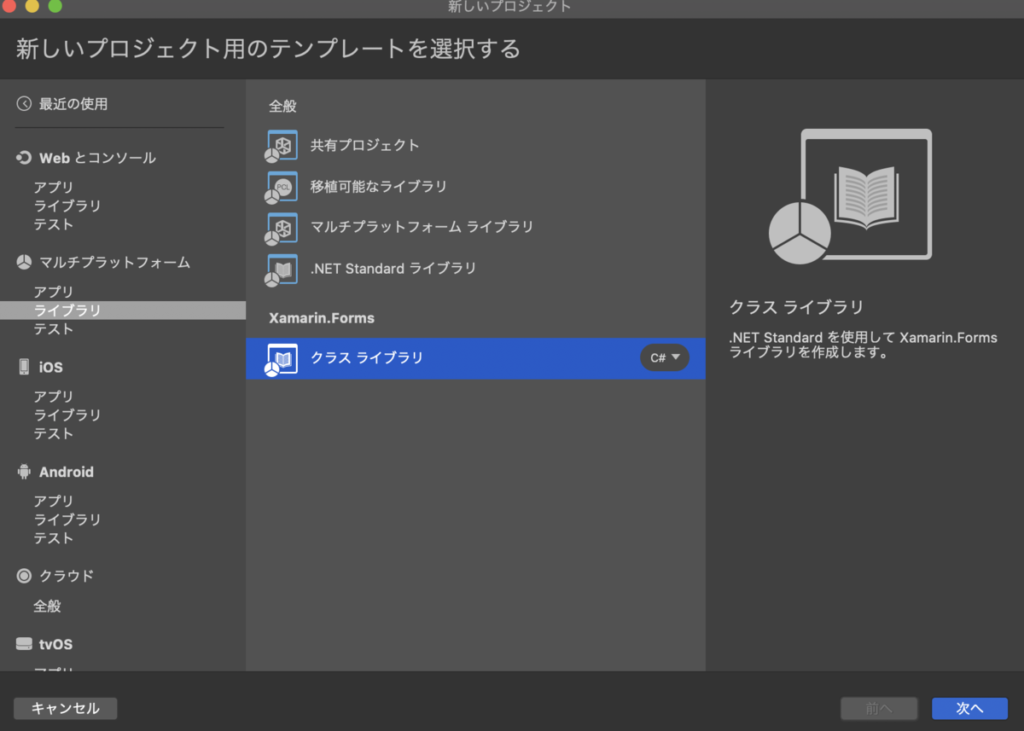
2.マルチプラットフォーム>ライブラリ>Xamarin.Forms クラスライブラリを選択
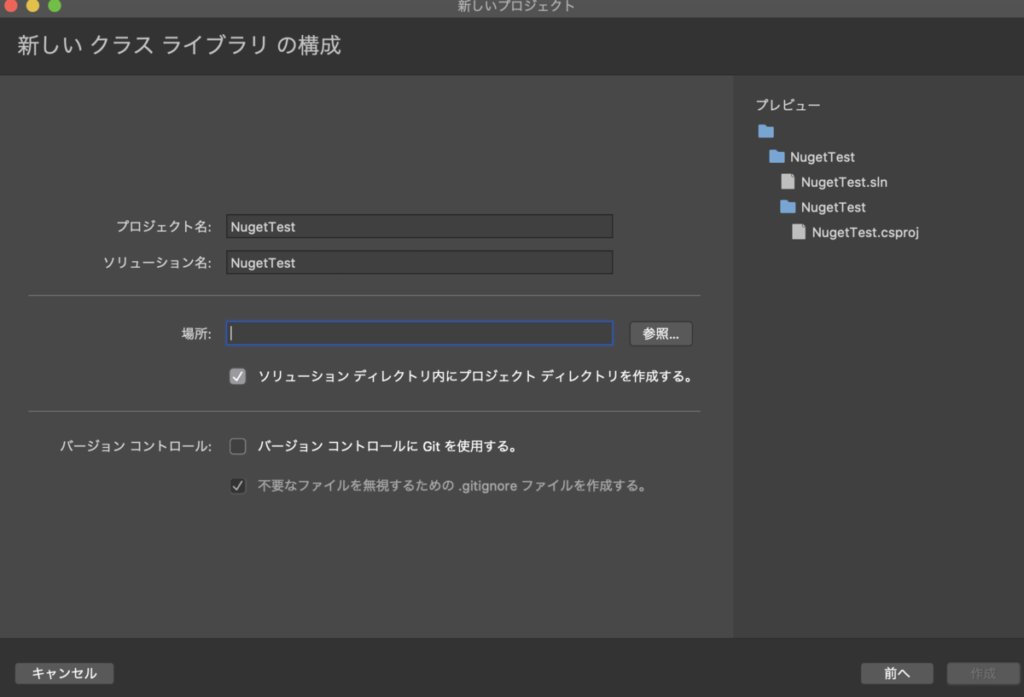
3.プロジェクト名、ソリューション名、プロジェクトファイルの保存先を入力し、作成
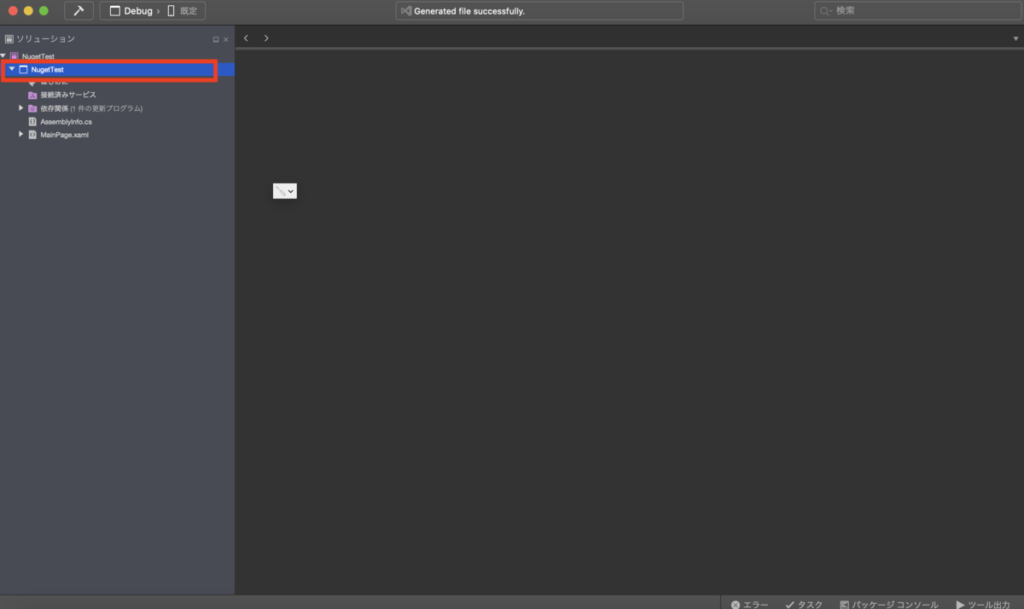
4.プロジェクトフォルダを選択しダブルクリック
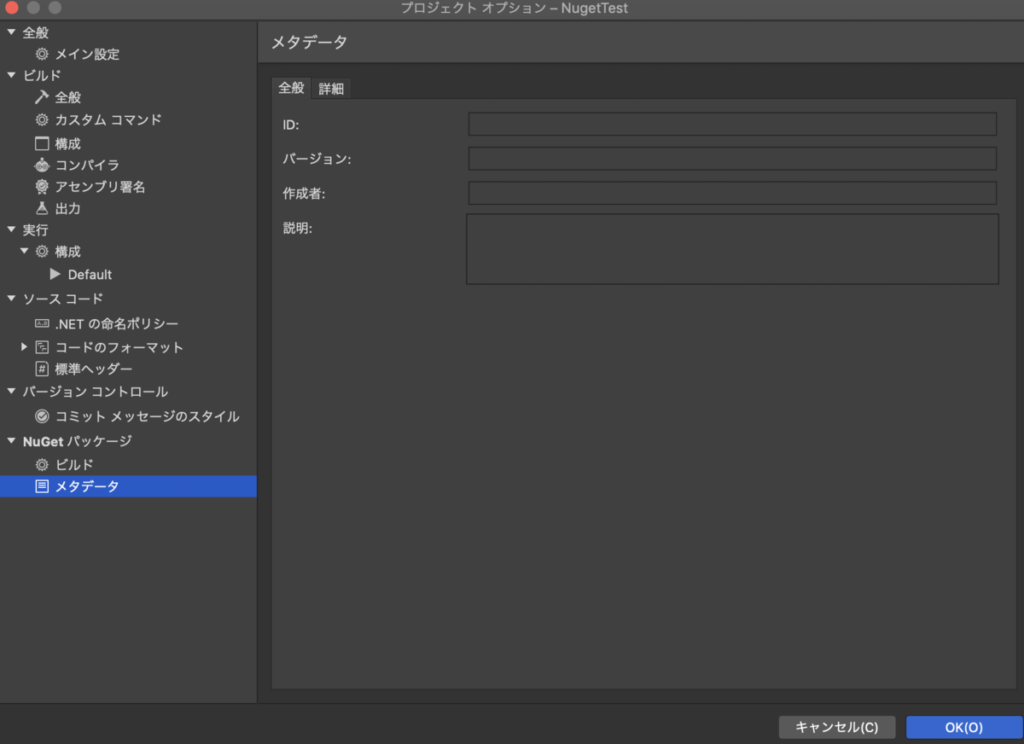
5.Nugetパッケージ > メタデータ
id,バージョン,作成者,説明を入力しOKを押す
6.プロジェクトファイル内にパッケージ化したい処理を書く
今回は例として、タップしたら色の変わるBoxViewを作成
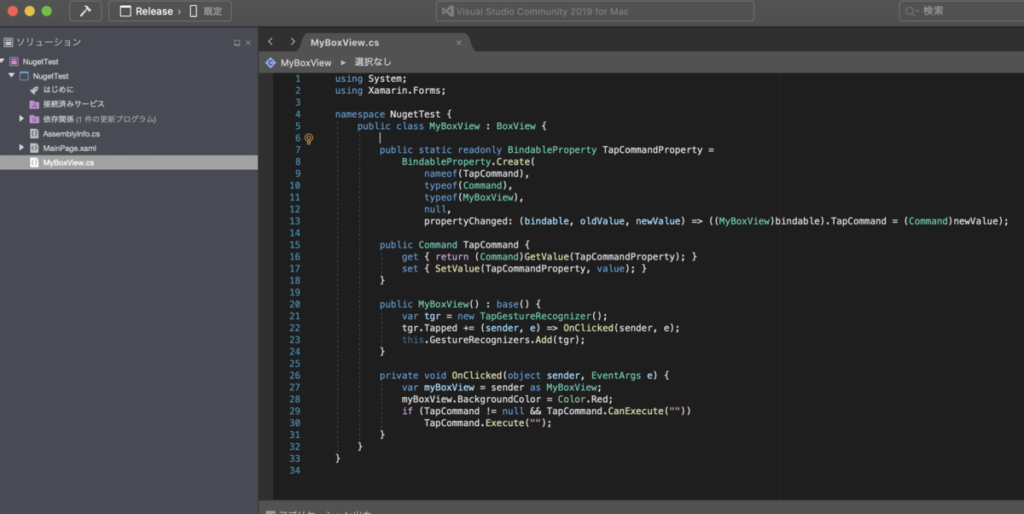
using System;
using Xamarin.Forms;

namespace NugetTest {
    public class MyBoxView : BoxView {

        public static readonly BindableProperty TapCommandProperty =
            BindableProperty.Create(
                nameof(TapCommand),
                typeof(Command),
                typeof(MyBoxView),
                null,
                propertyChanged: (bindable, oldValue, newValue) => ((MyBoxView)bindable).TapCommand = (Command)newValue);

        public Command TapCommand {
            get { return (Command)GetValue(TapCommandProperty); }
            set { SetValue(TapCommandProperty, value); }
        }

        public MyBoxView() : base() {
            var tgr = new TapGestureRecognizer();
            tgr.Tapped += (sender, e) => OnClicked(sender, e);
            this.GestureRecognizers.Add(tgr);
        }

        private void OnClicked(object sender, EventArgs e) {
            var myBoxView = sender as MyBoxView;
            myBoxView.BackgroundColor = Color.Red;
            if (TapCommand != null && TapCommand.CanExecute(""))
                TapCommand.Execute("");
        }
    }
}
7.ビルド構成をReleaseに変更

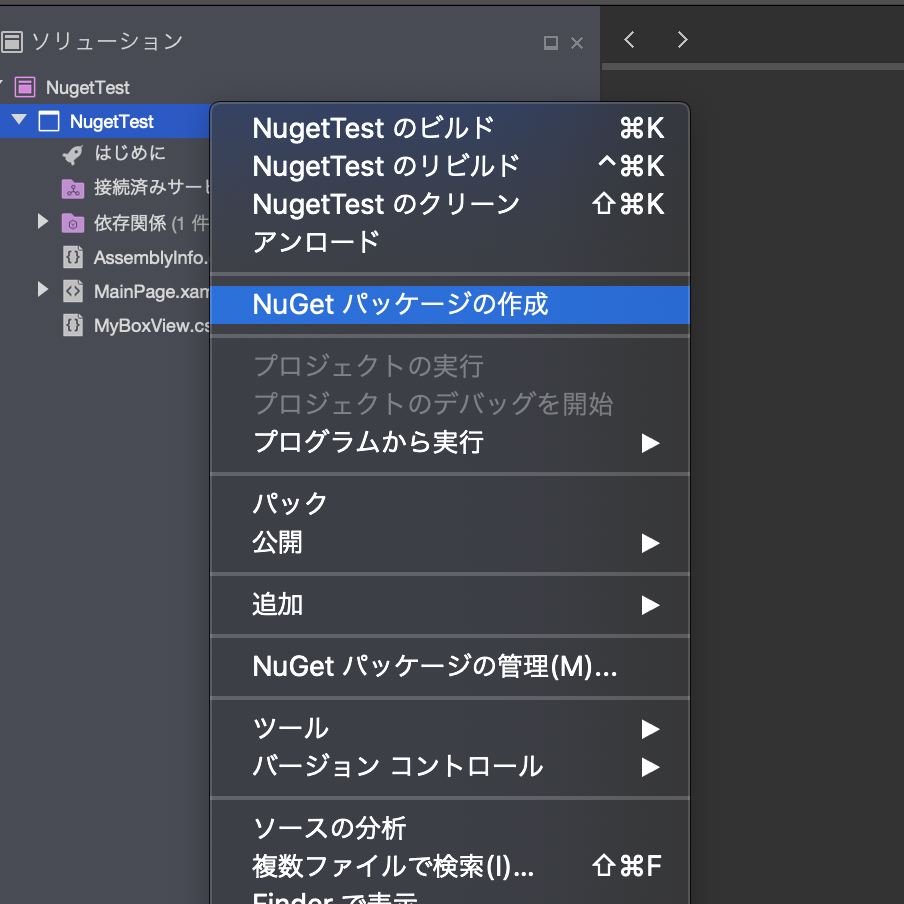
8.プロジェクトフォルダを右クリックし、Nugetパッケージの作成を押す
9.Finderで作成したプロジェクトのフォルダを開き プロジェクトフォルダ>bin>Releaseの中に「.nupkg」の拡張子のファイルができているので、デスクトップにコピーしておきます。
ここからは実際にNugetパッケージを使う工程です。
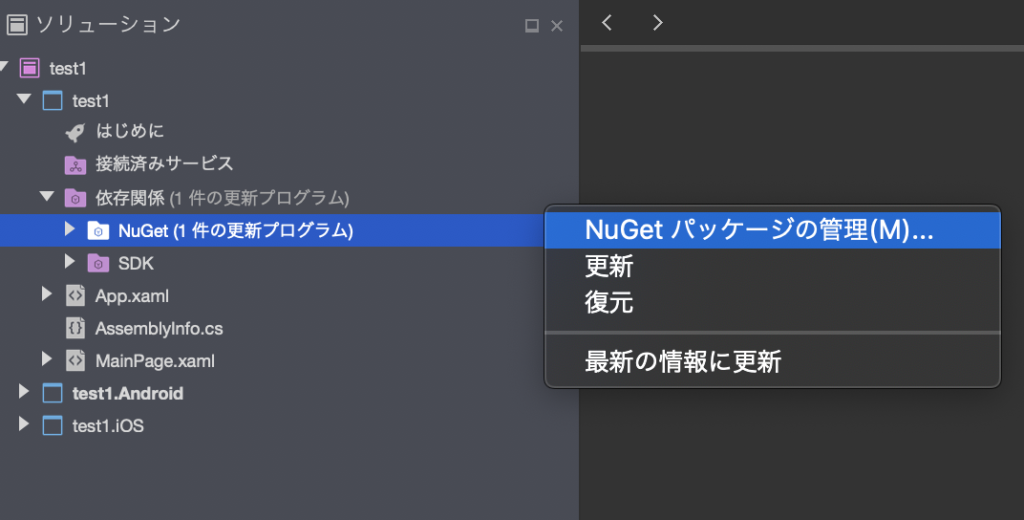
10.作成したnugetパッケージを使いたいプロジェクトファイルをVisualStudioで開く
11.プロジェクトのNugetパッケージの管理を開く
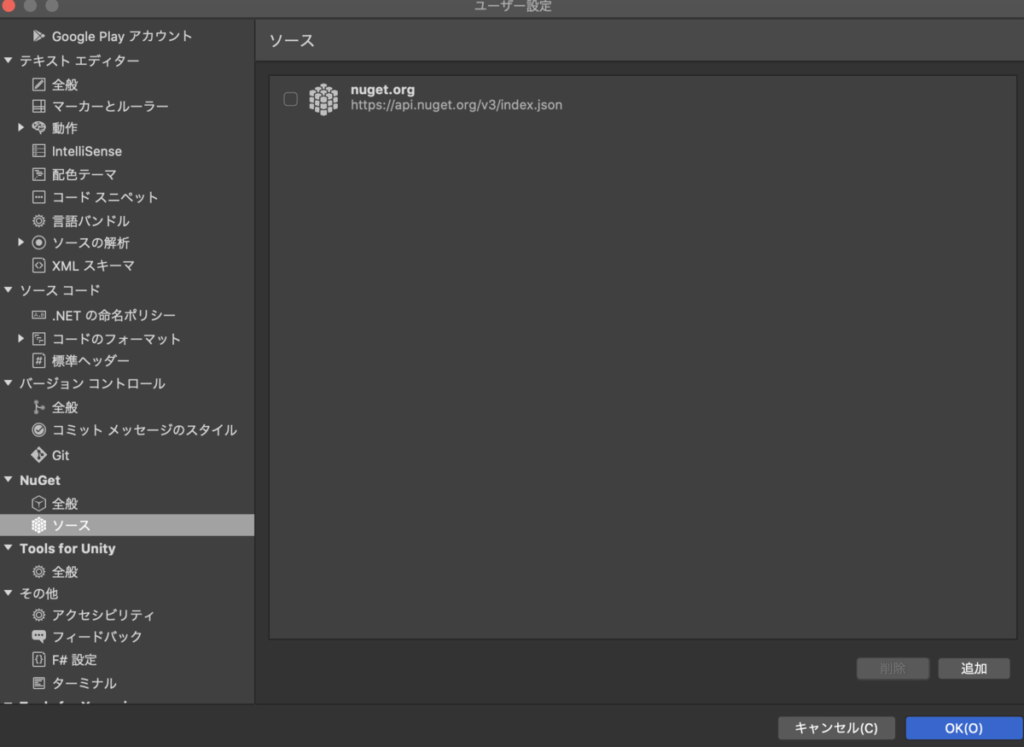
12.Nugetパッケージの管理のページ上部のタブから「ソースの構成」を選択

13.Nuget>ソースを選択後、追加を押す
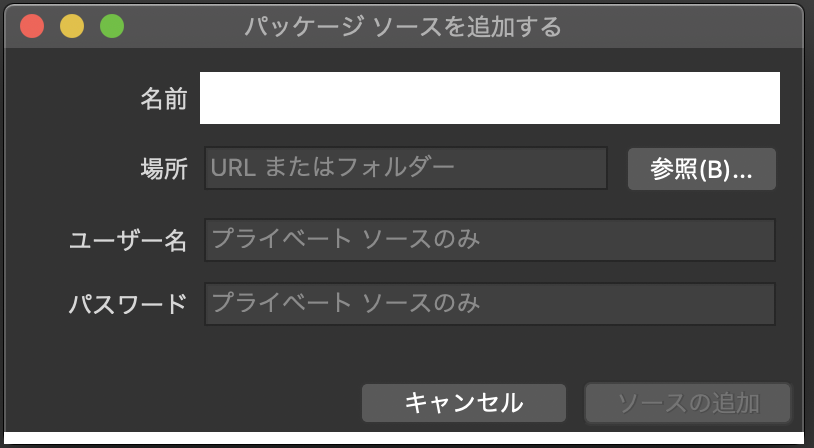
14.名前にDesktopと入力、場所にデスクトップのパスを入れ、ソースを追加を押す
(ユーザー名とパスワードは未入力でOK)
15.再度Nugetパッケージの管理のページを表示すると上部のタブから「Desktop」が選択できるようになるので選択
16.先ほど作成し、デスクトップにコピーしたNugetパッケージが選択できるようになっているので選択し、パッケージを追加する
17.追加したパッケージが使えるようになるので先ほど作った「MyBoxView」を使ってみる
<ContentPage
    xmlns="http://xamarin.com/schemas/2014/forms"
    xmlns:x="http://schemas.microsoft.com/winfx/2009/xaml"
    x:Class="test1.MainPage"
    xmlns:nugetTest="clr-namespace:NugetTest;assembly=NugetTest">
    <StackLayout
        HorizontalOptions="FillAndExpand"
        VerticalOptions="FillAndExpand">
        <nugetTest:MyBoxView
            BackgroundColor="Aqua"
            WidthRequest="100"
            HeightRequest="100"
            HorizontalOptions="CenterAndExpand"
            VerticalOptions="CenterAndExpand"/>
    </StackLayout>
</ContentPage>
xmlns:nugetTest=”clr-namespace:NugetTest;assembly=NugetTest”
↑ここのnamespaceとassemblyには自分がNugetパッケージを作る際に設定したプロジェクト名(namespace)を記述してください。
このようにして自分で作ったコントロール等をnuget化し使うことができます。
実際に動かしてみると
↓ページ表示
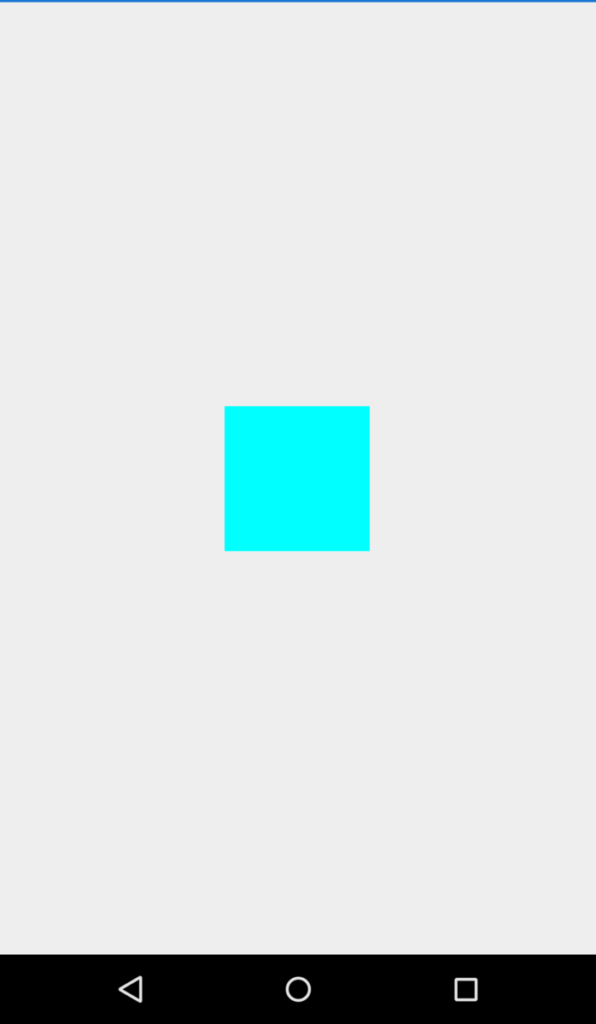
↓Boxをタップ
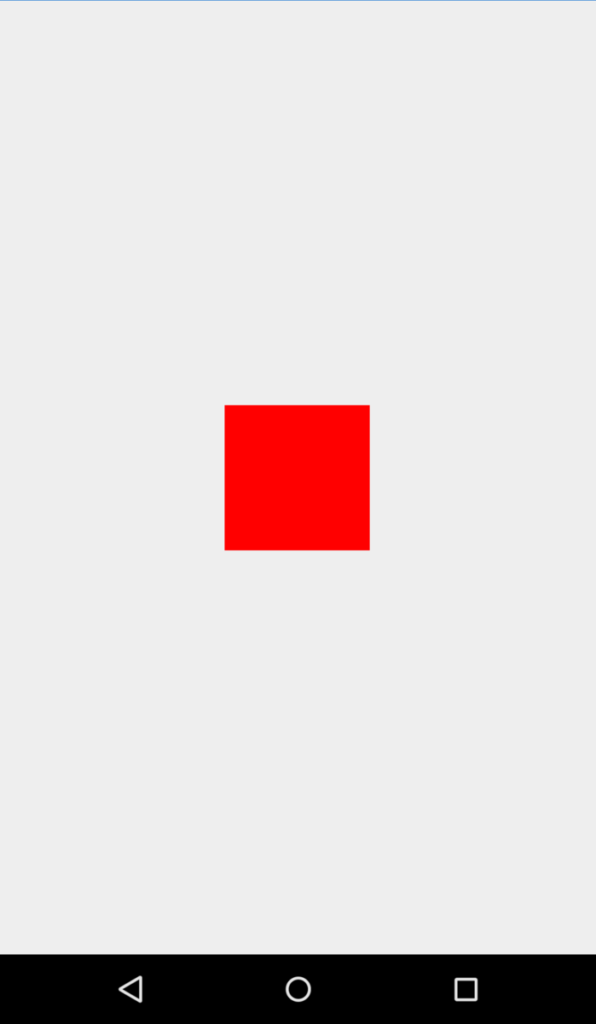
ちゃんと動きました。