
今回は「calendar_day_view」というライブラリを紹介します。
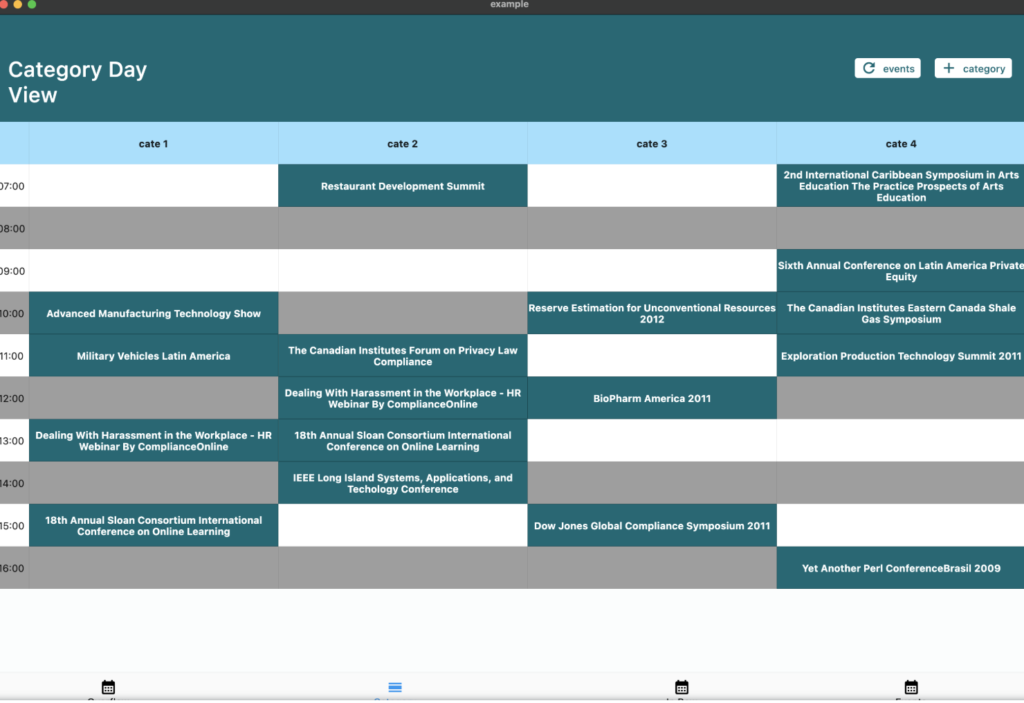
「calendar_day_view」は、1日のスケジュールビューを簡単に実装かつカスタマイズ可能なパッケージです。このパッケージを使用することで、1日の予定を時間軸に沿って視覚的に表示することができます。
基本的な使用方法
calendar_day_viewパッケージを使用して1日のスケジュールを表示する簡単な例です。
import 'package:flutter/material.dart';
import 'package:calendar_day_view/calendar_day_view.dart';

void main() {
  runApp(const MyApp());
}

class MyApp extends StatelessWidget {
  const MyApp({super.key});

  @override
  Widget build(BuildContext context) {
    return MaterialApp(
      title: 'Calendar Day View Example',
      theme: ThemeData(
        primarySwatch: Colors.blue,
      ),
      home: const CalendarDayViewPage(),
    );
  }
}

class CalendarDayViewPage extends StatelessWidget {
  const CalendarDayViewPage({super.key});

  @override
  Widget build(BuildContext context) {
    // サンプルのイベントデータ
    final events = [
      CalendarEventData(
        title: 'ミーティング',
        startTime: DateTime(2025, 2, 5, 10, 0),
        endTime: DateTime(2025, 2, 5, 11, 0),
        description: 'プロジェクトの進捗確認',
      ),
      CalendarEventData(
        title: 'ランチ',
        startTime: DateTime(2025, 2, 5, 12, 0),
        endTime: DateTime(2025, 2, 5, 13, 0),
        description: '同僚とランチ',
      ),
    ];

    return Scaffold(
      appBar: AppBar(
        title: const Text('1日のスケジュール'),
      ),
      body: DayView(
        date: DateTime(2025, 2, 5),
        events: events,
        onEventTap: (event, date) {
          // イベントタップ時の処理
          showDialog(
            context: context,
            builder: (context) => AlertDialog(
              title: Text(event.title),
              content: Text(event.description ?? '詳細なし'),
              actions: [
                TextButton(
                  onPressed: () => Navigator.pop(context),
                  child: const Text('閉じる'),
                ),
              ],
            ),
          );
        },
      ),
    );
  }
}
ポイント:
1.CalendarEventData: 各イベントのデータを保持するクラスで、タイトル、開始時間、終了時間、説明などを指定します。
2.DayView: 指定した日のイベントを時間軸に沿って表示するウィジェットです。dateプロパティで表示する日付を指定し、eventsプロパティでその日のイベントリストを渡します。
3.onEventTap: ユーザーがイベントをタップした際のコールバック関数で、ここで詳細情報の表示や編集などの処理を実装できます。
まとめ
calendar_day_viewパッケージを使用することで、Flutterアプリで1日のスケジュールを視覚的に表示・管理することが簡単になります。シンプルでありながら、カスタマイズ性も高いパッケージのため、アプリの要件に応じて柔軟に対応できるかと思います!